

Wondering How To Allow A User To Create Articles Using Joomla's Frontend Interface?
Introduction.
You may be hear after spending hours trying to get Users or a single User or a Users of a Group to be able to edit and add new articles using joomla frontend. You may have already spent hours or days reading all the Joomla forums and various articles directing you to ACL, category changes, users changes, and group creations, and you have found that none it worked after many hours of searching and wasted video tutorial watching. I hope this is the answer for you.
Please notice that this site is dependent on financial contributions (donations), and the ads on this website have very little financial contribution towards funding the creation of articles and website operation.
The following is not for guest or public visitors being able to create articles, but for existing users. In other words for a registered user (a user with a profile).
Steps For User Article Creation Via Website's Front Interface.
- Assign a user to a group that can Create and preferably Publish (for example: Author, Editor, Publisher, Manager or a group you created that is given Create).
- On Joomla's backend control panel top menu, go to Users, and select Manage.
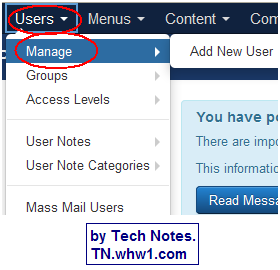
- Select User..
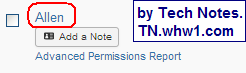
- Select Assigned User Groups tab.
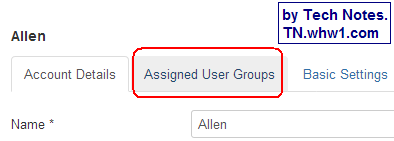
- Assign user to a group that has Create permissions, and click on Save & Close button.
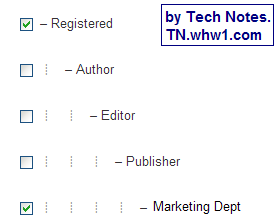
In this example, a custom group was created called Marketing Dept, and it was checked to add the user to the the group of Marketing Dept.
- On Joomla's backend control panel top menu, go to Users, and select Manage.
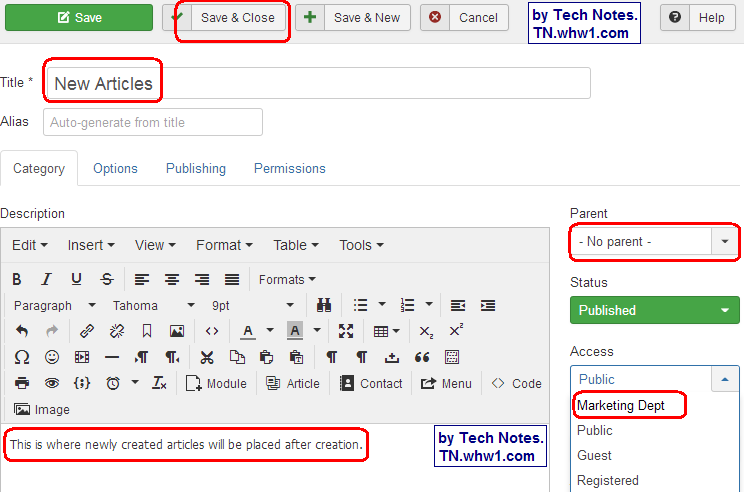
- Create a new category named something like New Articles. This is where newly created articles will be placed after creation.
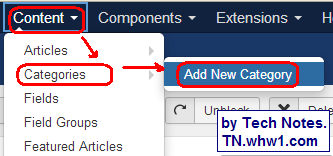
- On top menu, go to Content >> Categories >> Add New Category.
- Name category New Article, give it a description, select a Parent category or leave it as no parent if you want, select an Access Level that has the group you assigned the user to above. In this example, the Access level is named Marketing Dept, and it contains the Marketing Dept group.
- On top menu, go to Content >> Categories >> Add New Category.
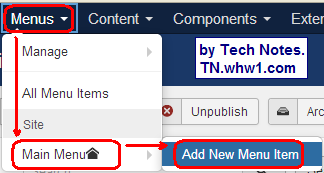
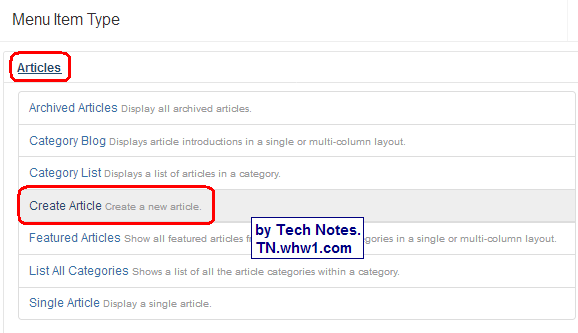
- Create a new menu item named Create Article (other good names are Make Article, or New Article), and give it the menu type of Create Article.
- Create a new menu item, and name it Create Article.
- Name it Create Article (or other name of your choosing), and select the parent menu, and the access level, and make the menu type as Create Article.
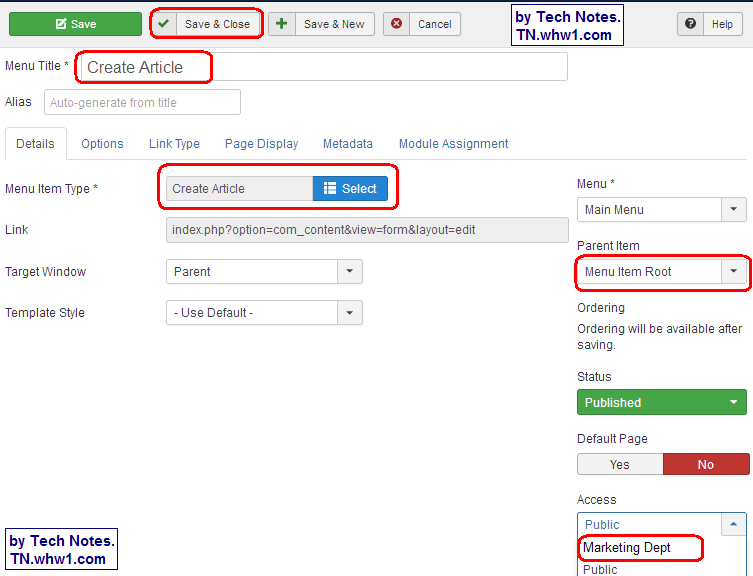
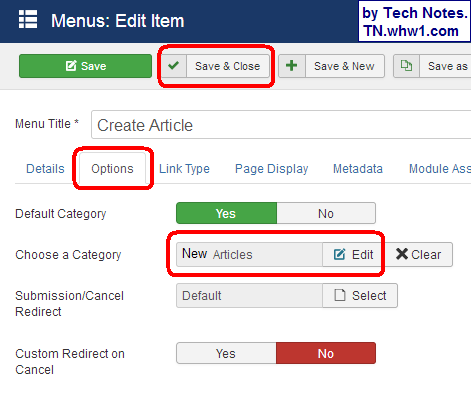
- Click Options tab, and choose the category you created above (in this example, it was New Articles category) for the Choose A Category field and Save & Close.
- Create a new menu item, and name it Create Article.
- Go to your website and reload/refresh the website page, and you should now see a new menu item named Create Article.
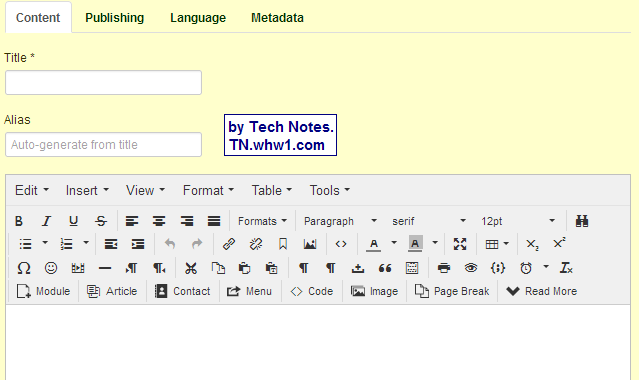
- Click on Create Article from your menu, and you will see a full edit interface show.
- Finished; enjoy. :)
Advice
I suggest creating another menu item using similar steps to above named something like "Incomplete Articles", or "Being Worked On", or "BWO Articles", or "New Articles", or "Newly Made". Hopefully you get the idea. Set the menu item as Category List and associate it with the category of New Articles or whatever you named your category in the steps above. Such a menu item then allows you to access New Articles category and edit articles that were started but not finished.
Consider Contributing
- Article Contribution:
Consider submitting an article of your own to Tech Notes. I will create a sub-category for your article if needed. Guest articles are welcome! - Financial Contribution:
If you found this article or any Tech Notes article useful, or beneficial in any form, and you'd like to make a financial contribution as a simple thanks (no fear, any small amount can be given), you can use the Paypal contribution button which is safe and does not require you to have a Paypal account to make a contribution to Tech Notes.
Feel Free To Leave A Good Comment,
And Donate. :)
Comment as a guest or site user.
Polite comments please.
Look around this site and it's menus, and you may find other useful articles.
Add this site to your Bookmarks/Favorites for easy return for new articles.